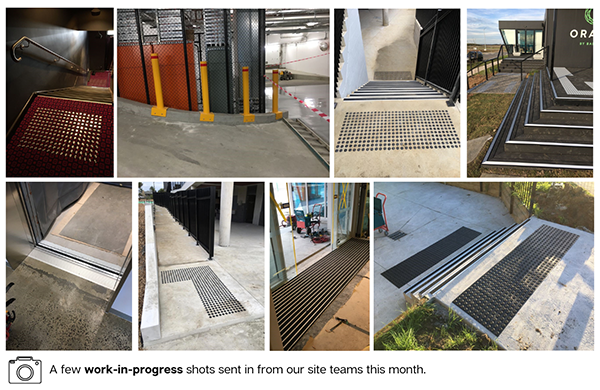
Welcome to the first edition of our blog. Exciting huh! Check out what we have been up to this month and we have included some info that isn’t necessarily common knowledge but is important to get it right so you can save costs on re-work. If there is anything you want to know more about, just simply shoot us an email at [email protected] and we will be in touch.
Did you know?
TACTILE INSTALLATION
Installing tactiles whether this be Peel & Stick Pads or Individual Buttons has long been an area of some intrigue!
Some companies won’t touch it because there seem to be too many unknowns and from a compliance point of view, some people find it easier to leave it to the experts.
Both points are true but with a little education and attention to a few details, some of the mystery and confusion can be eliminated.
Let’s talk about Peel & Stick Pads. These have an extremely aggressive adhesive backing that will bond to a lot of surfaces and permanently, but there are a few surfaces to watch out for:
Exposed aggregate. While you can put peel & stick on this surface, there are so many variables and associated problems it is better to use a more rigid tactile that is screwed down and does not rely on just the adhesive.
Or you could use individual drilled in tactiles, but just be aware that the nature of exposed aggregate is such that the raised points can deflect a drill bit and cause inconsistent spacing.
Green or uncured concrete. This can be a problem as the moisture coming out of the concrete will affect the bond and, in some cases, make the tile lift off completely.
The answer is to ensure the concrete has cured for several weeks before applying tactiles. The other way to overcome this is to use a primer to seal the concrete. In fact, to eliminate moisture problems that can arise, we would recommend using a primer for all porous surfaces.
The other problem with green concrete is that if this is drilled too early, the concrete can blow out around the hole damaging the visible surface of the concrete. One other trick for beginners is to check what’s happening under the drilling template when you first begin drilling as the holes can be blowing out and you won’t see this until the template is lifted off.
With Individual Stainless or Plastic tactiles, you drill into the substrate and then a pressure fit tactile is tapped into the hole. It is best to use drilling templates to ensure even spacing and consistency. If doing a long section of tactiles, don’t just rely on linking all the templates together, use a straight edge or stringline to set a datum.
If installing drilled in tactiles into porcelain, ceramic, bluestone or similar surfaces, the drilling needs to be done with wet diamond drills.
If you prefer not to drill these surfaces, individual tactiles are available with a peel and stick backing in both plastic and stainless types. These are very good but not totally fail proof. In high traffic areas and particularly areas that have shopping trolley traffic, these can pop off.
What’s been happening at Sterling?

TEAM TALK
July has been a busy month and we are very thankful to still be operating in these difficult times but we are wanting to make your day easier by providing a service that helps you get what you need in a timely manner.
We are still shipping our products all around Australia and our site teams are still operating in both Melbourne and Brisbane as Government regulations permit.
Many will possibly already be aware that we moved into a new warehouse at the start of 2021 in Campbellfield, Melbourne and this has been an ever-growing experience for our team and we have added a new staff member to our Melbourne team so we can better meet your demands as they come.
A little sneak peak into what’s to come for August;
– Watch out for an email from us on Monday 2nd August with an exciting gift attached!
That’s a wrap for July. Next edition August 31st.


